How to Make Beats with Reason
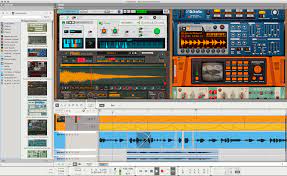
If you are interested in making your own beats, whether for hip-hop, EDM, pop, or any other genre, you might want to check out Reason. Reason is a powerful digital audio workstation (DAW) that lets you create, record, edit, and mix music with ease. In this blog post, I will show you how to make beats with Reason in a few simple steps.
Step 1: Choose a template
When you launch Reason, you will see a window that lets you choose a template for your project. You can either start from scratch or use one of the many templates that Reason provides. Templates are useful because they give you a ready-made setup for your genre of choice, with instruments, effects, and mixer channels already configured. For example, if you want to make a hip-hop beat, you can choose the Hip Hop template and get a drum machine, a sampler, a synthesizer, and some effects.
Step 2: Create a drum pattern
The most basic element of any beat is the drum pattern. To create a drum pattern in Reason, you need to use a device called Kong Drum Designer. Kong is a versatile drum machine that lets you load and tweak sounds from various sources, such as samples, synthesizers, physical modeling, and more. You can also add effects and modulation to each drum pad.
To create a drum pattern, you need to open the sequencer window by clicking on the icon at the bottom left of the screen. The sequencer window shows you the tracks and clips of your project. You can create clips by drawing them on the track lane with your mouse or by recording them with your MIDI keyboard or controller.
To draw a clip, select the Kong track and click on the pencil tool at the top of the sequencer window. Then drag your mouse on the track lane to create a clip of your desired length. You can adjust the length by dragging the edges of the clip.
To record a clip, select the Kong track and click on the record button at the top of the sequencer window. Then play your drum pattern on your MIDI keyboard or controller. You can quantize your recording by clicking on the Q button at the top of the sequencer window and choosing a quantize value.
To edit your clip, double-click on it to open the piano roll editor. The piano roll editor shows you the notes and velocities of your clip. You can add, delete, move, copy, paste, and modify notes with your mouse or keyboard shortcuts.
Step 3: Add some melody and harmony
Once you have a drum pattern, you can add some melody and harmony to your beat. To do this, you need to use some instruments from Reason's rack. The rack is where you can find all the devices that Reason offers, such as synthesizers, samplers, effects, utilities, and more. You can access the rack by clicking on the icon at the bottom right of the screen.
To add an instrument to your rack, click on the Create menu at the top of the screen and choose an instrument from the list. For example, if you want to add a synthesizer, you can choose Subtractor Analog Synth or Thor Polysonic Synthesizer. You can also browse through Reason's sound library by clicking on the Browser button at the top of the rack.
To create a melody or harmony track in your sequencer window, right-click on an instrument in your rack and choose Create Track for (instrument name). This will create a new track for your instrument and automatically route it to a mixer channel.
To create a melody or harmony clip for your instrument track, you can either draw it or record it as explained in step 2. You can also use some tools from Reason's toolbar to help you with your composition. For example, you can use Scales & Chords to generate chords and scales based on your input notes or use Players to add arpeggios, chords, scales, or note echoes to your instrument.
Step 4: Mix and master your beat
The final step in making beats with Reason is to mix and master your beat. Mixing is the process of adjusting the levels, panning, EQ, compression, and effects of each track to achieve a balanced and clear sound. Mastering is the process of applying some final touches to your mix to enhance its loudness, clarity, and overall quality.
This is my go to DAW. Hit me up for more.
If Reason isn't for you check the list of top DAW's for another selection.